Component Interop With React And Custom Elements
July 8, 2014
Today we'll look at how to wrap React components using Custom Elements, allowing us to interop with Web Component-based libraries using the DOM as a simple configuration API. Similar to libraries like Polymer, React cares about composition, lifecycle events and modularity so seeing how well it fits with Web Components is an interesting thought experiment.
As React doesn't need to take over your whole app and components built with it can comfortably live inside existing ones, you may indeed run into situations where component built with different libraries need to both co-exist and interop.
React
Let's remind ourselves that React provides a virtual DOM with rendering capabilities that avoid excessive layout thrashing (when JavaScript writes then reads from the DOM multiple times causing reflows). React batches such reads and writes to keep things fast. In a typical webapp we might heavily interact with the DOM, which is expensive to update. React prefers to avoid mutating the DOM directly, instead building a virtual DOM where it can handle updating the real DOM to match.
Part of React's ability to speed things up is that it doesn't guarantee making changes immediately, instead preferring to wait until the end of its event loop before touching the real DOM. This is when it calculates a minimal diff of changes and applies it to the real DOM as efficiently as possible. You could of course batch DOM updates and handle minimal diffs yourself, but React tries to give you this for as cheaply as possible.
If you haven't read into React much, I strongly recommend Josh Haberman's React Demystified.
Custom Elements
Custom Elements on the other hand allow us to define our own custom HTML tags which can be used in the same way as any standard tag that ships with the browser. So, for example if we were to register a special kind of form, we would use it as follows:
<super-form></super-form>
or in a way that more gracefully degrades:
<form is="super-form"></form>
As Custom Elements are still HTML elements, they can be easily composed, manipulated and created in the same way the <div> tag can be today. You could think of Custom Elements as a glue layer to other libraries and frameworks. It's actually quite easy to create Custom Elements using React inside them.
Differences in encapsulation
As Jonathan Krause covered in his article the value of React, Web Components opt for Shadow DOM as the preferred path to DOM and CSS encapsulation, opting for a standards track to solving the problem. With Shadow DOM, we might define the scoped styles for some content (e.g a heading) as follows:
<div><h3>My Light DOM</h3></div>
<script>
var root = document.querySelector('div').createShadowRoot();
root.innerHTML = '<style>h3{ color: pink; }</style>' +
                     '<h3>Hello Shadow DOM!</h3>';
</script>
React approaches such problems in a slightly different way, leaving the HTML DOM on it's own and opting to write CSS in JS. E.g:
/** @jsx React.DOM */

var divStyle = {
    color: 'pink'
};

React.renderComponent(<div><h3 style={divStyle}>
  Hello World!</h3></div>, mountNode);
Whilst this isn't for everyone, it's expressive and depends on whether you prefer an internal or external DSL for solving the problem.
ReactiveElements
I've been wondering where and if there's a world where React and Web Components might work well together and it's an interesting problem space. As Sebastian Markbage has previously said - the DOM is an imperative mutable API and as much as possible React gives you an immutable functional layer on top of this, a layer which Web Components don't quite aim to solve.
Denis Radin similarly wondered what React and Custom Element integration might look like, so he took the incentive to put together a small wrapper for React components to enable this called ReactiveElements. I've been using it this week and the solution works particularly well with native implementations of Custom Elements as well as the Custom Elements polyfill written by the Polymer team.
Creating Reactive Custom Elements
ReactiveElements ships with a method called document.registerReact() that allows you to build off document.registerElement() to create React-based Custom Elements. For example:
document.registerElement('my-react-element', reactClass);
will register a new custom element my-react-element. We can then start using this in our apps as follows:
<my-react-element></my-react-element>
Let's take this a little further.
In this practical example, we first define the logic for our React element and then register it as a Reactive custom element, using React's preferred styling conventions:
/* @jsx React.DOM */
window.Components = {};

window.Components.MyAwesomeWidget = React.createClass({
    getInitialState: function() {
        return {
            color: '#000000'
        };
    },
    render: function() {
        console.log(this.props.caseSensitivePropertyName);

        var renderItem = function (item) {
            return <li key={item.text}>{item.text}</li>;
        };

        if (this.props.items === undefined) {
            return <div></div>;
        }

    return (React.DOM.div(null,
        "<my-reactive-element>",
            React.DOM.ul( {style: this.state}),
                this.props.items.map(renderItem)
            ),
        "</my-reactive-element>"
    ));
    },
    changeColor: function(color) {
        this.setState({
            color: color
        });
    }
});

document.registerReact('my-reactive-element', window.Components.MyAwesomeWidget);
We can create new instances of our element as follows:
var element = document.createElement('my-reactive-element');
We can then set properties of the element (like the items) using attributes of the current node:
element.setAttribute('items', '{window.justBirds}');
In this case, our items are seeded data from a simple justBirds object:
window.justBirds = [
     {'text': 'Raven'},
     {'text': 'Dove'},
     {'text': 'Colibri'}
 ];
We can change class names the same way we would any normal DOM element:
element.className = 'has-shadows';
...execute React-component specific methods via the node:
element.changeColor('pink');
and use props (React's way to perform data flow from owner to owned component):
element.props.items = [
    {'text': 'Chrome'},
    {'text': 'Firefox'},
    {'text': 'Safari'},
    {'text': 'Opera'},
    {'text': 'IE'};
Similar to earlier where we set data for items using attributes, we can similarly do the same using props.items and our array of browsers.
Great. So far we've primarily just been interacting with our React element in the same way we would any other HTML element.
Note: Examples using the above Reactive element with native Custom Elements, Polymer and X-Tag are available.
Interop with Polymer and X-Tag
Let's talk more about interop with other libraries using Custom Elements. At the time of writing two such libraries are Polymer and X-Tag, which we already know can happily coexist on the same page. The reality is that as long as we create our library/framework specific elements according to the Custom Element spec, all of them can interop using the DOM with ease.
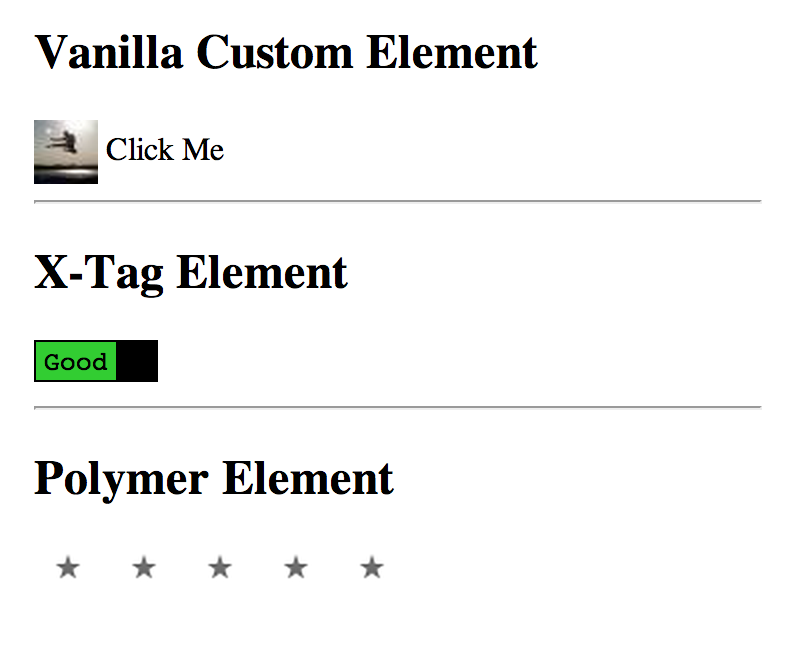
To look at interop, we're going to borrow the existing interop example Rob Dodson put together for Polymer and X-Tag. The basic idea here is "Click Me" represents a vanilla Custom Element which can then go and toggle the current state of the X-Tag Element and ratings of the Polymer element. Everyone plays together nicely.
The core piece of code handling the "Click Me" behaviour is the following:
// polymer-ready informs us all of our HTML imports have loaded
document.addEventListener('polymer-ready', function(e) {
    // We can then just querySelector our elements
    var btn = document.querySelector('icon-button');
    var xswitch = document.querySelector('x-switch');
    var ratings = document.querySelector('polymer-ui-ratings');

    btn.addEventListener('click', function(e) {
      xswitch.toggle();
      ratings.value = ratings.value === 0 ? 5 : 0;
    });
});
Let's extend this demo so that "Click Me" inside our vanilla Custom Element is also able to control our React(ive) custom element. First, we add an instance of our Reactive element to the page:
<my-reactive-element id="carousel" items="{window.browsers}"></my-reactive-element>
Next, we query the DOM for the element:
var reactCarousel = document.getElementById('carousel');
We can then have our click handler call out to a component method within our Reactive element:
carousel.changeColor('red');
and change the component attributes, in this case items:
carousel.setAttribute('items', '{window.movies}');
In my live demo, we toggle the text color rather than just changing it to red, but we're otherwise just interacting with elements written using different libraries just by using good ol' querySelector and the same APIs we would use to work with native HTML tags.

Run the demo to check it our for yourself: http://addyosmani.github.io/react-interop/demo.html
Conclusion
React is pretty awesome and so are Custom Elements. So, let's end this with some practical advice. When working on an application that uses React all the way down, it may be preferable to use it directly if you have perf in mind, as you'll benefit from it being able to apply its diffing algorithms consistently throughout your components.
If however you find yourself working on applications with widgets written using different libraries, opting for Custom Elements bring an interesting level of interop potential that is worth keeping in mind. They bring a powerful amount of glue between different ways of building applications and still allow React to benefit from the virtual DOM within the scope of React components living on the page.